
빈으로 등록해서 사용하셨군요.
@component 와는 어떤 차이가 있나요
방탈출 예약 관리 미션을 하면서 이런 질문을 받았습니다.
왜 repository에는 @Repository 애너테이션을 붙이는 걸까요? @Component를 붙이면 안 될까요?
어떤 차이가 있는 지 알아보겠습니다.
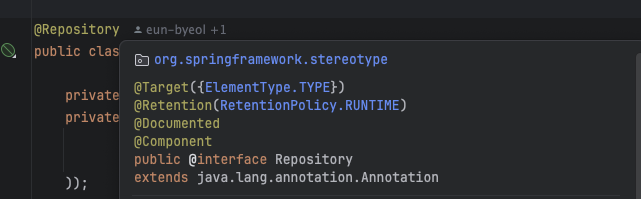
@Repository
@Target(ElementType.TYPE)
@Retention(RetentionPolicy.RUNTIME)
@Documented
@Component
public @interface Repository {

	/**
	 * Alias for {@link Component#value}.
	 */
	@AliasFor(annotation = Component.class)
	String value() default "";

}@Repository 코드를 보면 @Componet가 함께 붙어있습니다.
@Component 애너테이션 덕분에 @Repository를 붙인 객체도 ComponentScan의 대상이 되는 것을 알 수 있습니다.
@ComponentScan을 지정하지 않았는데, 어떻게 ComponetScan이 됐지?
@ComponentScan(excludeFilters = { @Filter(type = FilterType.CUSTOM, classes = TypeExcludeFilter.class),
		@Filter(type = FilterType.CUSTOM, classes = AutoConfigurationExcludeFilter.class) })
public @interface SpringBootApplication {@SpringBootApplication 애너테이션 내부에 @ComponentScan이 포함되어 있기 때문입니다.
@ComponentScan을 명시한 클래스를 포함하여 하위 디렉토리를 검사합니다.
프로젝트의 최상단에 애너테이션이 명시되어있었기 때문에, 전체 디렉터리가 ComponentScan의 대상이 되었던 것입니다.
예외 처리
다시 본론으로 돌아와서,
@Repository 공식 문서에서
A class thus annotated is eligible for Spring DataAccessException translation when used in conjunction with a PersistenceExceptionTranslationPostProcessor.
두 가지 키워드를 얻을 수 있습니다. DataAccessException과 PersistenceExceptionTranslationPostProcessor는 무엇일까요?
DataAccessException
This exception hierarchy aims to let user code find and handle the kind of error encountered without knowing the details of the particular data access API in use (e.g. JDBC).
JDBC와 같은 data access API의 세부사항을 몰라도 데이터 관련 예외를 통일하여 처리할 수 있게 해 줍니다. 즉, DB가 다르더라도 일관적인 예외를 반환해줍니다.
PersistenceExceptionTranslationPostProcessor
Translates native resource exceptions to Spring's DataAccessException hierarchy. Autodetects beans that implement the PersistenceExceptionTranslator interface, which are subsequently asked to translate candidate exceptions.
이때, 특정 DB의 데이터 관련 예외를 스프링의 DataAccessException로 변환해 주는 것이 PersistenceExceptionTranslationPostProcessor입니다.
PersistenceExceptionTranslationPostProcessor 코드를 보면,
Repository.class 타입을 Advisor로 등록하고 있습니다.
public class PersistenceExceptionTranslationPostProcessor extends AbstractBeanFactoryAwareAdvisingPostProcessor {
    private Class<? extends Annotation> repositoryAnnotationType = Repository.class;

    ...

    @Override
    public void setBeanFactory(BeanFactory beanFactory) {
        super.setBeanFactory(beanFactory);

        if (!(beanFactory instanceof ListableBeanFactory lbf)) {
            throw new IllegalArgumentException(
                    "Cannot use PersistenceExceptionTranslator autodetection without ListableBeanFactory");
        }
        this.advisor = new PersistenceExceptionTranslationAdvisor(lbf, this.repositoryAnnotationType); // advisor로 추가
    }
}
즉, 결론부터 말하자면
@Repository는 데이터 관련 예외를 캐치하여 스프링의 DataAccessException 예외로 다시 던져주는 기능을 제공합니다.
데이터 관련 예외 변환을 해주는 PersistenceExceptionTranslationPostProcessor가 @Repository 애너테이션이 적용된 모든 빈에 Advisor를 추가하기 때문입니다.
계층화된 디자인
일관된 예외 처리를 위해 @Component 대신 @Repository 애너테이션을 사용하는 것일까요?
더 중요한 이유는 계층화된 디자인을 위해서입니다. 계층에 따라 특정한 애너테이션을 사용하면, AOP에 이점이 있습니다.
아래는 DAO 계층에서 메서드의 실행 시간을 측정하는 예시입니다.
@Aspect
@Component
public class PerformanceAspect {
    @Pointcut("within(@org.springframework.stereotype.Repository *)")
    public void repositoryClassMethods() {};

    @Around("repositoryClassMethods()")
    public Object measureMethodExecutionTime(ProceedingJoinPoint joinPoint)
      throws Throwable {
        long start = System.nanoTime();
        Object returnValue = joinPoint.proceed();
        long end = System.nanoTime();
        String methodName = joinPoint.getSignature().getName();
        System.out.println(
          "Execution of " + methodName + " took " +
          TimeUnit.NANOSECONDS.toMillis(end - start) + " ms");
        return returnValue;
    }
}
@Repository을 명시한 클래스의 모든 메서드와 일치하는 pointcut을 만들고, 해당 pointcut을 타겟팅하여 메서드 호출 실행 시간을 구할 수 있습니다.
정리
- @Component
- 스프링 빈 등록을 위한 일반적인 stereotype annotation
- @Repository
- 데이터, 영속성 계층을 위한 구체적인 stereotype annotation
- 데이터 관련 예외를 캐치하여 스프링의 DataAccessException 예외로 다시 던져주는 기능 추가 제공
- 계층화된 디자인을 위해 구체적인 stereotype annotation을 사용하자
참고
'Spring' 카테고리의 다른 글
| 👣 로그 수집과 모니터링 구축기 (2) | 2024.11.20 |
|---|---|
| 코드로 더미 데이터를 추가해보자 (21) | 2024.05.27 |
| Controller는 어떻게 테스트 할까?(feat. RestAssured vs MockMvc) (1) | 2024.05.20 |
| SpringBootTest 격리 방법 : @DirtiestContext의 대체재 (0) | 2024.05.06 |